Saturday, March 30, 2013

Unit Three: The limbs

I'm going to be combining a few things I'd planned on. The two separate units that were going to be arms and legs are getting combined into one. Still, we're starting with arms so let's get to it.

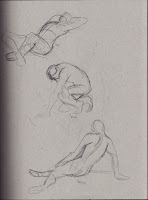
Not much to say this time. Just a general sketch blast.


Started with some structural studies from my drawings books trying to get a feel for the general construction of the arm and its planes. Boy is this thing complex. 


Closing this out with some studies and digital painting studies to end this one. The difference in the skin on this one was cool. The bottom one is of a woman and due to the lighting on her the skin had a bit of a cold tint to it. The arm at the top right had a warmer feel to it and it was awesome to have an exercise force me to look at that.

Sunday, March 24, 2013

Bonus Post: Perspective

Well I actually had time to do a little bonus exercise and I thought I'd upload it before I have to start thinking about going to my hellish job :(

I learned about perspective very young. I was about 8 years old when one of my first art teachers taught me the technique. I remember loving it but I guess sometimes, since I learned it so young that I take for granted that I need to practice it as often as the other stuff I do and link it with the new stuff I've learned. Someone noted that working on the solidity of construction, especially with regards to perspective would help so I decided to give it a go. There's a pose from the gesture drawing tool with a low angle shot that I love but it also has a great sense of perspective that I wanted to try to learn from.


This is the reference pose. I chose to look at this in a VERY planar and blocked out exercise. The goal was not to get it to look like the model but to examine perspective, planes and a certain level of proportion. 


First, some small scale sketches.


I like trying to work out perspective small scale first. It helps me keep the vanishing points situated and means I don't always need a ruler. I went with one this time just so I could be POSITIVE of the angles and everything. 


Legs are a different unit down the road but I couldn't resist as the pose emphasized the legs through the low angle shot. Also extra points for a bit of lighting practice. 


Unit Two: Trunk Cont'd-planar stuff

New stuff today. I wanted to put this up yesterday but life has a nasty habit of getting in the way of making art.

I got blindsided by my store manager at my job and my schedule got changed without my knowing. I was in the middle of a drawing when I got a call from my manager wondering where I was since I'm always on time (early in fact) and I was supposed to be there about a half an hour ago when he called.

I, however, was unaware I was supposed to even bee at work! Needless to say I was pissed. I'd been planning on going to sleep within the next hour when he called and then ended up having to do an overnight shift out of nowhere that I was not physically or mentally prepared for.

Anyway enough of that nonsense. Drawings!


Gesture drawings to start. While I'm still not a fan of these they're getting easier and I'm hating doing them less (if only because they look less like hen scratches now. 


Next a up, a paltry pair of planar practice pieces: Try saying that three times fast. The bottom one is actually what I was in the middle of when I got the call and I was NOT happy. I was planning on getting a couple of other things done that night and the next morning but like I said, life. It's a four letter word for a reason. 


Finishing off this post with a couple of body type studies. Not as fun and far more technical than my last body type blast but still educational. 

I think after a couple more digital paintings that are hopefully coming next post we'll move on to some of the limbs. I'm thinking arms since I've been cheating a bit on my trunk definition and drawing them anyway and they're easier to work on at work since I'm cut off from my other references and without a lot of down time. 


Monday, March 18, 2013

Unit Two: The Trunk-back and gestures

Did I mention lately how much gesture drawing infuriates me? 


Just a few today and as usual you can see our dud for the bunch. This time firmly on the left hand side near the bottom. Poses like that are frustrating. 

Anyway onto a few other explanations. The obese trunk study is sort of a follow up from yesterday when I did the various body type studies and is referenced from a study in one of my books, a bit of imagination and lots of pics to try to get it right. Needless to say I think it feel more than a bit short but it misses being the dud this time. 


Okay, these make me feel a little bit better about myself, mostly due to feeling like I learned a bit more from them. These are studies from one of my books where I try to understand the planes of the body a bit more by wrapping contours around them (except for the drawing on the top that's again from the body type studies the other day. I feel like these are helping to prepare me for the painting side of things later. 


Update

Hey folks, I found the old google connect follower button again. To anyone out there who is watching this blog it'd be a great way to let me know there are some eyes out there in the darkness.

Feel free to make your presence known.

Anyway, we will return you to your regularly scheduled figure drawing studies later in the day.

Sunday, March 17, 2013

Unit Two: The Trunk-Body type studies

Before I head in to work today I thought I'd do something with Celia M's comment earlier and add some variety to the body types studied.

As I may or may not have pointed out here on this blog earlier, fantasy art has a tendency to go with the classical ideas of "ideal proportions" and has a tendency to homogeneity in its body types. I personally think this has something to do with the Greco-Roman tradition inherent in the mindset behind the training necessary to represent a relatively accurate version of the form but that's just me.

Enough philosophizing though. Here's a little something to tide you over until the next image blast.


I really need to remember to give myself some more warm up time though. It's especially apparent in the upper two on the left and right but my lean came back. Mostly eliminated in the later ones it did show up a little bit today. 

All models here are actually pics found around the internet and used for educational purposes. 

Saturday, March 16, 2013

Unit Two: The trunk cont'd (retroactive)

Why retroactive? Because I found some studies I forgot to upload. 


Unit Two: The Trunk Cont'd

Okay. It's been a bit since I've posted but I warned you that was going to happen. Anyway, continuing the ongoing improvement of figure drawing skills with a study of the trunk of the body.

The first things I worked on for this entry were some muscular studies. I was working on something else (I think it was another study for this blog) and realized that part of my difficulty probably stemmed from not having a solid grasp of what the musculature under the skin was doing. To remedy that I thought some musculature studies similar to my skeleton studies would work. Above you see the pages from my sketchbook and below you'll see some details.


These were a lot of fun and knowing what I know about the skeleton now seeing how everything attaches is really interesting. It also demonstrates how and why armor design so closely resembles musculature. As the muscles protect the organs by layering and interlocking, so does armor. For example, I've always known the pectoral muscles connect at the sternum but was unaware of how they connect to the deltoids, the muscles that make the semi rounded shape of the shoulder. In the back muscles wrap around sort of like a vest from the mid back to the sides of the pecs. All interesting stuff. 


I did fewer studies this time than last, partially because of the detailed nature of the muscle studies but I wanted to do some work on twisting and the back of the trunk. Also, I wanted to do a study with a different skin tone. I did my black and white underpainting and I'm not sure how I feel about it. I'll try again. 

On the subject of doing these studies of the back I think it goes without saying (though I'll say it anyway) one must learn to draw the human body from all angles. These exercises of course remind me of what one of my teachers said. You have to learn to make a sort of 3-D model in your head of what you're trying to draw so that you can rotate and manipulate it in your head. Seeing in the round essentially. A skill that serves sculptors of every sort infinitely but is also remarkably helpful to an illustrator doing representational and or figurative work. 

So I need to be able to build my objects in my mind from the inside out AND make the final 3-D image in my mind manipulatable? 

Why does it sound like I'm training to use a Green Lantern ring? Admittedly, second best super power for an artist ever. What's the first? 

Making your drawings come to life. Duh 
:D

See you next time. 


Saturday, March 9, 2013

Unit Two: The trunk

This unit is going to be a good bit longer than the skeletal unit was (though as I said, bits are going to show up from time to time). Without further ado let's jump right in. 

First one here... yeah this doesn't have a lot to do with the figure... or does it? Dun dun dun. Okay in all seriousness it does and it doesn't. Really I felt very tight when I started working one day and though that some perspective shapes might fix that. It does help with the body though because essentially what I'm trying to do is reaffirm my knowledge of how the body behaves with regards to perspective. Having a shape, say a rectangular prism, around the body helps to figure that out. 


Decided to play around with changing camera angle and what that does to examining the form. That sort of came off of the perspective shapes exercise earlier. Also gave me another opportunity to practice turning of the trunk. A couple are referenced from one of my books and one, the one with 'reference' written next to it is from the gesture drawing tool. however, several are me trying out some of what I've learned about the spine, torso and body movement so there are a few from imagination as well. 


Did another digital painting study of a female trunk. Once again the gesture drawing tool provided the model here. Don't think I succeeded as well as I'd like but once again I did learn something from it. 


Finally I've got two male trunk studies. Both were done relatively quickly and helped me decide on my next move. I definitely need to do some muscle studies for the front and back of the torso before moving forward. So that's what you'll see on the next episode of Go Figure. 

See you soon. 

Thursday, March 7, 2013

Unit one: Skeletons continued

No gestures this time. Don't worry, there will be more. There'll have to be. Sigh. Anyway continuing the skeletal studies has been most enjoyable. Getting a better idea ow what the internal workings of the body are like has been very, very helpful. All images in this post are scanned directly from my sketchbook and were done on the 3rd and 4th.  


Perhaps a bit too helpful. I'm starting to notice a kind of funny side effect. I'm starting to be able to see how the skeleton is positioned when I look at someone standing. It's only brief flashes in my mind, but it behaves like a really weak and unreliable form of X-ray vision right now. Like, for the briefest moment I'll look at how someone is standing and then all of a sudden I won't be seeing them but their skeleton. Something similar happened during my first painting class when I couldn't help but look at something and see how it would be taken from a drawing to a finished painting. 

Anyway, moving away from my unreliable but developing superpowers the above studies are from one of my books. Specifically The Human Figure  by Vanderpoel. My notation for those unable to read my chicken scratch:

"A part of a person's size and dimension is obviously determined by the shoulders and ribs (implying the skeleton as a whole). Varying these must produce varying body types."

Obvious notation is obvious yes but it is a note that I need to make sure I study many physical types. I like fantasy art but it has a habit of being rather homogenous with its body types. Especially where women are concerned. 


More stuff from the gesture drawing tool in the image right above this one. Now remember when I said no gestures this post? Well I kind of lied. Forgot that these started with me trying the new gesture drawing technique I picked up in Anthony Ryder's book and THEN doing the skeleton on top of it. I tried to keep things loose here. Multiple colored pencils helped me to care less about perfection and more about the character of the pose. 


Again, stuff from the gesture drawing tool. The skeletal stuff is sort of finished as its own unit. You'll see elements of it in all the drawings of course but it's time to move on to the trunk. For the purposes of practice I'm defining the 'trunk of the body' as the neck to the upper thigh. A part of this is so that there will be overlap when I move to the arms and legs and it'll be easier to mentally put a whole figure together in the end (I hope. I'm partially making this up as I go admittedly). 

This was mostly me trying out a couple of tricks I remembered from my figure drawing class in college and a couple of new things I picked up out of Ryder's book again. He's got a technique called using an envelope that I'll outline in a later post and I'll use it to develop a figure from reference and imagination for anyone interested. Every time I do a session there is always a dud drawing. A runt of the litter as it were and the female planar study is that this time. I think the twist threw me. I was also starting to fatigue. Hitting that one dud drawing is usually the indicator it's time to take a break. 

Monday, March 4, 2013

Books Arrived!

I'm rather excited one and all. I ordered three new figure drawing books a couple of weeks ago and they have officially arrived today.


 These were two of the books I bought and I'm liking both of them a lot already. The first one by John H. Vanderpoef has been really beneficial with the skeletal understanding so far. The second one by Anthony Ryder has helped me dramatically become less angry at gesture drawings. It's one of the only times I've actually seen the technique of gesture drawing broken down well AND connected to the later finishing of a figure. Good stuff.


This is actually my favorite of the three books I've bought. It's got a bit of a hard angular style to its figure approach but the way it teaches thinking about the figure is probably my favorite and combined I think they will be great companions to one another and I'm very happy they are in my library. More drawings are coming soon folks so stay tuned. 


Saturday, March 2, 2013

Unit one: Skeleton and some digital stuff

Okay. Time for post two. Probably shouldn't burn through my material like this so fast but I've got a back log and I feel like this will help encourage me to keep working. Anyway, when I planned this blog I knew I'd need a plan to drive my self education. I created a plan to keep myself organized and learn to build my figures from the inside out.

Step one was working on the skeleton. The longer drawing at the end of the last post was me prepping mentally for that. Anyway... skeletons!

 While drawing the skeleton was fun it was a bit frustrating to discover I'd made it just a bit too tall. The average male is about 8 heads high and this ended up being 9. Gotta work on that. I found a great skeleton reference and spent some quality time studying that.

The overall plan here is to use this unit focused on skeletons to improve the overall knowledge of how the body twists, bends and moves in space. There will probably be several more skeleton gestures before moving on to the other units which focus on other skills and aspects of the body.


This one was a bit trickier and required a technique I picked up when I read Bridgman's life drawing in school. I'm expecting my own copy in the mail soon. 


Skeleton and then musculature on top of it studies. Fun times. I even went ahead and used some charcoal. I hate charcoal with a passion. You have no idea.

I felt I'd close out today with some digital studies I did as well. Again, these aren't all done on the same day. 


These last two are kind of special in a way. I have a hard time solving color and value problems at the same time. My brain just has difficulty with it. I know a couple other artists who struggle with it and so they're processes have evolved to compensate and we wall pretty much do the same thing. Do a value under painting layer and then work the color on top of it. I decided to push myself on these last two and try to solve the two problems at once. 


They came out okay. I'm not happy about them but as one of my old teachers is fond of pointing out I shouldn't ever really be 100% happy with anything I make. They're better than I've done in the past and that's the real goal here. I hope you enjoyed these. There will be more coming in time. 

Side note: Yes I know my hands are really rough and I'm thoroughly embarrassed by that fact. I like drawing hands and lately I just haven't been doing them well. There is an entire unit dedicated just to them and arms but it might need to be moved up in line. We shall see. 

Again, all figures are from the gesture drawing tool unless otherwise noted.


Let's Begin: Gestures and starting studies

Alright folks. Post one to begin this. After this, the blog is officially fully live. How should be begin? Well, frankly, with gesture drawings. 


If I'm perfectly honest, I hate gesture drawings. Not because they're not useful. They are. Immensely so. It's just they're also incredibly frustrating for me. I hope that changes as I do more of them. They always just look so bad. I know the point isn't necessarily looking good but it always bugs me. Only blind contour drawings get to me worse than these.

Not all of these are done in the same session and they're not all the ones I do, just the ones that made me want to chuck them in a fire the least :) Okay, after warm up I move on to some other things. Usually full figure studies only going 5 to 10 minutes. They tend to be things I'm a bit happier with and I feel like I learn more from them.

Here are a couple from relatively recently. Take a gander if you will.


You should know I've discovered I really loved toned paper.


The drawing here was 15 minutes but I was working toward something specific. I'll explain in the next post.

Note: Because I do not have access to alive model at this time, all poses are from the gesture drawing tool unless otherwise stated.


Figure it out

Okay I said I'd do this so the journey officially begins. Welcome to Go Figure, my new figure drawing blog where anyone who wants to accompany me on my road to becoming a stronger illustrator can stop by and hope on the trip with me.

Now while this is called Go Figure and it is primarily going to be  figure drawing blog I suspect this will likely become a sort of online sketchbook where anyone interested can see the hard work that goes into the training to becoming an illustrator

There will be sketches, studies, perhaps even a still life or two but the majority of this blog is likely to be skill building exercises, studies, epiphanies, musings and random articles I discover about improving illustration and drawing skills. I expect a few studies for finished work here but process stuff for portfolio illustrations will primarily still go elsewhere.

I doubt there will be posts every day. I will certainly be attempting to draw every day, that's how you improve, however, due to my real world schedule updates are likely to come in bursts and batches if it's art related.

Okay, enough pontificating. Let's get this show on the road and see what this evolves into.

... And see how many figure drawing puns I can throw out.